Sunday, October 25, 2015

Making Dialogue Punctuation Tactile


Texas TEKS Student Expectation for Fifth Grade


5.16.A.iii: Write imaginative stories that include dialogue that develop the story

The Challenge


It's difficult for my ELL's (English Language Learners) to fully grasp punctuation rules. We drop the inverted question marks and exclamation marks when they change languages, and so much of their cognitive power translating and functioning in a second language. (Something I feel equivalently anytime I step into a room of native Spanish speakers and I'm the only non-native speaker there.)

So, the challenge is that I want my fifth graders to be able to write imaginative, inventive stories, and dialogue, I know as a reader and a write, is massively important to creating engaging narrative, regardless of the level or age of the author.

The Process


Lesson 1:

Part I. I downloaded the declarative knowledge of what the word dialogue means and what it look like through abbreviate notes. (Also played a Brainpop video to one group for reinforcement)

Lesson 2

Part I: Brief verbal review of notes with emphasis on noticing punctuation marks.

Part II: Students copied examples of dialogue out on sentence strips. Then, I asked them to make a cut between the dialogue and the dialogue tag. After this, I asked them to cut off the comma, then the quotation marks, and finally the punctuation. I modeled with my own sentence how I could rearrange all the pieces to move the dialogue tag to the front almost like a magic trick. The students then tried to replicate the effect with their own manipulatives and I helped them. (Sometimes we had to make an extra comma or extra period, depending on the sentence.) Finally, students put their pieces into baggies and mixed the pieces up and challenged friends to reconstruct their sentences correct. For extra challenge, some cut the entire sentence into separate words as well. They loved the challenge.


Lesson 3

Part I: Whiteboards: Reviewed parts of dialogue and dialogue tags by showing sentences with no punctuation whatsoever and have students identify using the context only which part was dialogue and which part was tag. Whiteboards let me give immediate feedback.

Part II: Adding punctuation on whiteboards--students then started adding in correct punctuation on their own, but easily fixed with rapid teacher feedback.

Part III: Students used map colors to add in commas, question marks, exclamation marks, periods and quotation marks onto worksheets with prewritten dialogues.

Lesson 4: Scaffolded Dialogue Construction

We read part of an amazing wordless graphic novel by Shaun Tan called The Arrival.

Part I. The book is about an immigrant man passing through a surreal version of New York and adapting to life there.

Using whiteboards, we invented our own dialogue for the page, discussing and making inferences about what we think the characters might be talking about.

Again, using whiteboards at this point in the process helps me correct errors in the students' understanding of how to compose dialogue very, very quickly. This is very much "You do--I help" part of the guided release model.


Part II. Once students start so show proficiency, we moved to writing on notebook paper and practicing making correct indentations when we change characters. We also practiced the importance of paying attention to neatness and organization (skipping first line, pausing at the pink line and returning to the red line on standard notebook paper). We discussed as a class when we should or should not start new paragraphs.

If you don't own this book, it's totally worth having in your library. It does an amazing job of making you feel like an immigrant in a foreign country while using dream-like imagery to provoke deep questions and thoughts--all without a single word in the entire book.This was still guided work, but with less support.

The next step is for students to compose the next set of dialogue on their own! More to come!


End Product Goal: Social Studies Integrated Project: Loyalist vs. Patriot Dialogues! [Coming soon!]


Subject/Predicate

D: What is a subject and a predicate?


  • A subject and a predicate are the two parts of every sentence.
  • The subject is who/what the sentence is about.
  • The predicate is what the subject is doing or describes them. 

P: How do I find subject and predicate?

  1. Ask, "Who or what is this sentence about?"
  2. Ask, "Where is the verb?"   
The subject is in green. The predict is in yellow.

Ramon eats.
Ramon eats nachos.
Ramon eats nachos too often and gets bellyaches.
Little dinosaur Ramon eats nachos.
Little dinosaur Ramon eats nachos too often and gets bellyaches.


C: Why do we use subject and predicate?

  • Because you need both pieces to have a complete thought.
  • Missing a subject or predicate makes a fragment.

Apostrophes


D: What is an apostrophe?

An apostrophe is a punctuation mark used to show:
  • ownership
  • contraction


P: How do we use apostrophes?


Ownership
  1. Add an 's to the end of the person who owns it
  2. If the word ends in 's' just add an apostrophe to the end
The nachos belong to Ramon = Ramon's nachos
The fish belong to the dinosaurs = the dinosaurs' fish

Contractions
  1.  Push the two words together.
  2. Substitute the apostrophe for the missing sound.

is + not = isn't
can + not = can't
she + will = she'll
they + would = they'd
I + am = I'm


C: Why do we use apostrophes?

  • to show who owns something
  • to speak/write faster


Text Structures


D: What are text structures?


Text structures are patterns authors use to organize information.


P: How do I find text structure?

  1. Read the text well. 
  2. Check your understanding.
  3. Tell the main idea.
  4. Ask yourself, "How is the information presented?"
  5. Look for signal words.


C: Why do we use text structures?


Knowing text structures helps us remember better, read it faster, and make better predictions.

Sunday, October 18, 2015

Unit 2: Exploration & Colonization Part II

This project idea isn't my idea, so I've got to give credit where credit is due. I got the idea from this blogger after stumbling onto her stuff via Pinterest.


I don't know what her demographics are or what her kids' levels look like, but I wanted to scaffold my students' work a little more in order for them to have success on this project. 

First, I made a bad example and a good example of the project. I had them pass them around and talk in groups about what a good project looks like and what the bad project looked like and how to fix it.


Also, rather than have them Google information, we used this website:


I also gave them a similar research sheet, but I wanted them to practice citing their sources, so I gave them a column for sources, although mostly their information all came from the same website. 

The students' learned about and presented information on their colonies and it stuck well enough that I had one confide to me he knew the answers on a district test four weeks later because he had found out that information while researching his colony. 

Next year, I intend to repeat the project, but I will tweak it to encourage the kids to take the map parts home and include more color. They look great, but I think the originals from Room 6's are a little more aesthetically pleasing.

Even so, for a first six weeks project that included research before the scope and sequence calls for teaching the research process, it turned out great.


Social Studies & Reading Integration


Since nonfiction passages have the highest Lexile levels on the STAAR test, my grade level set a goal to work more on nonfiction throughout the year to help raise students' ability to comprehend nonfiction and to integrate more Science into the Reading classroom.

During the first six weeks, I took pieces of Teacher Created Materials digital books on the 13 Colonies and broke it up into small chunks. I then paired the students off and had them read through their chunk and break it down. 

To build their comprehension, we practiced Repeated (Close) Reading:

  1. Read the section for yourself silently
  2. Read it again with your partner and talk about it
  3. Read it a third time and work on the Figure 19 skill assigned
  4. Read it a fourth time and break out the main idea for each paragraph
The students did this in pairs and made posters on large sheets and then presented/taught their information to the rest of the class. This is a very time-costly process, but the deep reading really produces growth.


Social Studies & Fluency


We also built reading fluency by performing two plays about the colonists. 

We used this book:


I looked it up on Amazon and only two people have bothered to review, and one of them was scathing and rather hateful. So to be fair, if you go looking for this book, it says it's easy to read and it it is definitely that. If you teach in a school with students on fifth grade level, you may find the readability far below what you're looking for. However, if you work with ESL, bilingual, or struggling readers, these plays can be very empowering. Know your students. Mine ate it up! We hosted multiple performances throughout the day. Talk about reading with purpose. Performance is a great purpose for reading!


Thursday, October 1, 2015

Point of View: Limited vs. Omniscient


D: What is point of view?


  • Point of view is who is telling the story.

P: How do I find point of view?

  1. Ask, "Who is telling the story?"
  2. Classify as:
First Person: The narrator is a character in the story. 

Third Person Limited: The narrator is inside the head of only one character.

Third Person Omniscient: The narrator is outside the story and knows everything.


C: When/why do I find point of view?

  • Point of view affects the mood of the story. A different narrator makes the story feel different.

Main Idea


D: What is main idea?

  • Main idea is the big idea in a nonfiction text.

P: How do I find main idea?


  1. Read the text. 
  2. Check your understanding. Reread.
  3. Find the repeating idea.
  4. Find the idea that connects everything together.

C: When/why do I find main idea?


  • Good readers use main idea to learn from nonfiction texts.


Wednesday, September 30, 2015

Theme

D: What is theme?

  • Theme is the life lesson (moral) in a work of fiction.

P: How do I find theme?

  • Find the character who changed.
  • Ask, "How did the character change?"
  • Ask, "What does this tell me about life?"

C: When/why do I find theme?

  • I find theme during/after reading.
  • I find theme because it helps me apply the story to my own life.

Tuesday, September 29, 2015

Elements of Procedural Genre


D: What is the procedural genre?


  • Procedural texts are "how-to" text. They teach you how to do something.
  • Written with steps in sequential order
  • Nonfiction

P: How do I read a procedural text?


  • Read the whole text once to get the gist of the task/recipe/game/instructions.
  • Pay attention to the steps and focus on the order.

C: When/why do read procedural texts?


  • We read procedural texts to learn how to do something.


(13)  Reading/Comprehension of Informational Text/Procedural Texts. Students understand how to glean and use information in procedural texts and documents. Students are expected to:
(A)  interpret details from procedural text to complete a task, solve a problem, or perform procedures; and

Elements of Persuasive Genre

D: What is persuasive writing?


  • Persuasive writing is texts that try to convince you to buy something, do something, or believe something.

P: How do I read a persuasive text?


  • I look for the AAA!
  • I look out for exaggerations (bigger than reality).


C: Why do we read persuasive texts?

  • Decide who to vote for
  • Look for commercial deals
  • Challenge our beliefs


(A)  identify the author's viewpoint or position and explain the basic relationships among ideas (e.g., parallelism, comparison, causality) in the argument; and

(B)  recognize exaggerated, contradictory, or misleading statements in text.

Inferencing

D: What is an inference?


  • An inference is a conclusion (idea) you make by connecting what you read to what you know.

P: How do I make an inference?

  1. I can retell what I read accurately.
  2. I connect what I read to what I know.

Do this: 

Not this:


And definitely not:


C: When/Why do I make inferences?

  • I make inferences during/after reading.
  • I make inferences because it brings me to a deeper understanding of the text. 


Monday, September 28, 2015

Elements of Biography: PDAS

D: What is a biography?


A biography is the story of someone's life.

  • Nonfiction
  • Sequential text structure

P: How do we read biographies?


Look for P.D.A.S.!

People: Who are the important in his/her life?
Dates: When did this person live?
Accomplishments: What is he/she famous for?
Struggles: What problem did he/she have?

C: When/why do we read biographies?


  • We read biographies to inform ourselves about other people and how they helped make the world a better place.
  • We read biographies because we want to be inspired. 

(7)  Reading/Comprehension of Literary Text/Literary Nonfiction. Students understand, make inferences and draw conclusions about the varied structural patterns and features of literary nonfiction and provide evidence from text to support their understanding. Students are expected to identify the literary language and devices used in biographies and autobiographies, including how authors present major events in a person's life.

Dialogue & Quotation Marks


D: What is dialogue?

  • Dialogue is when characters talk.
  • Dialogue uses quotation marks to mark itself.
  • Dialogue is a sentence that has two parts: dialogue and dialogue tag.

"I want nachos," Ramon whined.


Ramon whined, "I want nachos."

P: How do I write dialogue?


  1. Use quotation marks around the dialogue.
  2. Follow these punctuation models.

"___________," said Ramon.
Ramon said, " ____________."


"__________?" asked Ramon.
Ramon asked, "__________?"


"__________!" shouted Ramon.
Ramon shouted, "_________!"


C: When/why do I use dialogue or quotes?


•I use dialogue when writing narratives.
•I use quotes when doing research.

Sunday, September 27, 2015

The Big Data Derailment


Let me start this article off on the right foot:

I do like data.

I really do.

Not as much as a Triple Chocolate Andy's Frozen Custard, but I do like it. I sit around at home with cat and play with data for fun. (Frozen custard on the side would make it even better)

Now that I've admitted that I'm going to say something bold. Something that might make you curl your toes a little bit because it (along with some of my other views on literacy) go against the current of what's popular in testing, er, teaching these days.

Analyzing STAAR data is derailing literacy instruction in Texas.


Data Driven to Death


Data is good, but it's only good if you know how to read it, and the longer I watch trends of analysis the more I see data being completely misinterpreted all over. 

We're missing the forest for the trees, folks.

Like I mentioned in a previous article, Reading isn't like the other tests. Reading tests have two components: passages and questions.

If you're only analyzing the questions and using that to draw conclusions about quality of instruction, student ability, and overall literacy and direction of you or your school's direction, then you could be sending your train out the front window.

Why are so many schools struggling so much to catch up to current Reading standards and failing. There's a lot of reasons, because an entire state of people and schools is so vast and diverse, but I'd like to focus on just one aspect today: miscalculations.

Teachers and administrators are reading their SE hotspots correctly and even putting them into perspective by using blueprints and testing frequency charts. However, with this advent of testing culture and the need for everyone to be 'data driven' all the time, it has taught districts, schools, and teachers to think about literacy like this:


We study and study and study. We discuss and discuss and discuss. We plan and plan and plan. We do it all for the sake of being data driven! We want to fix those particular SE's! We must! We're doing it for our kids' sakes, our schools' sakes, our own sakes!

But it's not working.

If it were the real answer, for all the work we're putting in over four years worth of STAAR now, we ought to be seeing more results. Instead, more schools than ever are being classified by the state as "Improvement Required."

Why, oh, why?

Because, like I mentioned, we're missing the forest for the trees. Because of popular trends in educational jargon, we've focused on the tiles, the small pieces of what we think the problem is based on what a testing company paid by the state (and now fired by the state) told us our problem was.

But here's the thing.

The tiles aren't literacy. They're good for analysis to an extent, but they're not enough.

Why? Because literacy isn't tiles. It isn't isolated concepts or isolated skills. All those little things: character roles, conflict, main idea, inferencing, drawing conclusions, context clues--they all link up into what literacy actually is. If we want to improve, we have to zoom out to the big picture.

Literacy is a mosaic of cognitive skills. 


Those skills that the test doesn't open examine or quantify are what break our students if we don't address them in the classroom, even if we don't have numerical data from a test to quantify or justify their instruction. 

If you have a population of students who are not passing STAAR, don't only look at your SE's.

Also consider: 
  • Metacognition (Rigor): Can your students think about thinking?
  • Lexile/Guided Reading Levels: Can your students understand enough of the passage to have a chance of passing?
  • Do your students believe in themselves? Do they think they can be good readers?
  • Fluency: Do your students read fast enough to remember what they read?
  • Decoding: Hand in hand with fluency--Do your students need serious intervention?
  • Vocabulary: Do your students know what to do when they don't understand?
  • Background Knowledge: What are you doing to broaden the knowledge base of students whose families can't afford to take them places to gain new experiences?
  • Language Transition: What SIOP strategies are you using to help students find success in their second language?
  • Stamina: Are you giving your students time every day to read self-selected texts? Reading is a skill, not a content. You don't get better at doing it by learning about it.


Class Dinosaurs by Patrick Stannard


Our three favorite dinosaurs as drawn by the wonderful Patrick Stannard. You can check out more of this fantastic artist's work at

Patrick Stannard's Blog

Thank you, Mr. Stannard!

Tuesday, September 15, 2015

Unit 2: Exploration and Colonization

Day 1


We began by adding a new tab: Exploration & Colonization and making our big idea page. We drew a ship to represent the many people traveling to the New World via ship and asked the Big Question: Why do people leave their country and where do they go?

I don't feel this one is as profound as my unit one question, so maybe I can revise it next year, but it's still an important question.


In order to talk about the movement of so many people, kids need to be able to visualize the world. Many fifth graders don't come preloaded with that knowledge, so I break out my hoard of 5 classroom globes, and we hunt down the names of the continents and label this simple map.

Then we make a map key coloring the two continents we're focusing on: North American and Europe.

We add symbols to England and the colonies.

We mark an X for San Augustine later, during the San Augustine mini-lesson.


Day 2


Texas history TEKS call for history to begin at the founding of St. Augustine, so I copied off on white paper a sketch of San Augustine and used map colors to colorize in no more than 30 seconds of furious scribbling.

The picture flaps open, and the content inside reads:


  • owned by Spain
  • fort
  • in Florida
  • missionaries


Day 3


Next, I use cards that have pictures of famous colonists or explorers. I put the pictures on cardstock and wrote very brief notes on each person. I hung two signs in the room: Conqueror/ Colonizer.

I gave the students the notes on how to tell the difference (also conquerors come first) and as I displayed each leader's name, the students thought about it, then walked to the sign they thought the person best fit. 

I also asked students to put a star next to the reason they thought would most likely convince them to leave home. Hadn't I run out of time, I would have had them write about this, but c'est la vie.


Day 4


I show parts of a clip of America the Story of Us, Episode 1. The entire documentary is too long, and you need to be careful to cut if off before they go into the details of the people of Jamestown resorting to cannibalism. If you splice the video right, the children can still a recreation of life in Jamestown and what their economy looked like. 

We made notes in the shape of Jamestown. I like to have all the kids stand and count off how many would be dead if we were there. 


Day 5


I showed another segment of America, the Story of Us, showing the struggles of the Pilgrims and the harshness of their climate. We drew our notes in the shape of the Mayflower.


Day 6


Students took home this trunk and drew three non-electronic devices they would take with them if they went packing to the New World with the Pilgrims.

The picture is from a book called History Pockets: Life in Plymouth which you can get on Amazon.


Day 7


We add flaps of two important aspects of colonial government: Mayflower Compact & Virginia House of Burgesses (or House of Burgers or Boogers, according to some of my more humorous children).

The inside of the Mayflower Compact says it is a form of democracy because the people on board all agreed to obey the rules, which they wrote themselves.

The inside of Virginia House of Burgesses says it was the first representative government because the men were elected by the people to make decisions for the good of the colony.


Day 8


I divided the class into groups to study the 3 regions of the colonies. Using Teacher Created Materials as adopted by our district, the students read articles and practiced Reading Fix-Up strategies while pulling the main ideas out onto a large sheet of paper in groups. This took an entire class period to do with me walking around and scaffolding, but the students worked very hard and were very meticulous in their work. Then each group presented their findings, and we colored in the regions of the colonies. We added the economies of each region by invent a map key.


Day 9


We studied conventions of a friendly letter in Language Arts, and then analyzed this letter on Scholastic with audio:


Using ideas from here, I scaffolded a letter for my students by brainstorming with them and provided sentence stems. (Remember, I teach bilingual.) For a monolingual classroom, you might use fewer stems. If students have their own ideas or want to add more, go for it!

[to be continued!]


Monday, September 14, 2015

Winner-Winner Chicken Dinner!


I won a raffle for an artist I support on Patreon. You can check him out here:

Patrick Stannard, Animator, Patreon

So I decided to use my free sketch to help my kids practice writing friendly letters by letting them write a real letter to Mr. Stannard. Excited to see what he makes of our favorite dinos! (There was much heated discussion over which two most deserved to be drawn with Ramon.)


Thursday, September 10, 2015

Interactive Reading Journal

This is a follow up post to this article on Interactive Reading:

Interactive vs. Independent Reading


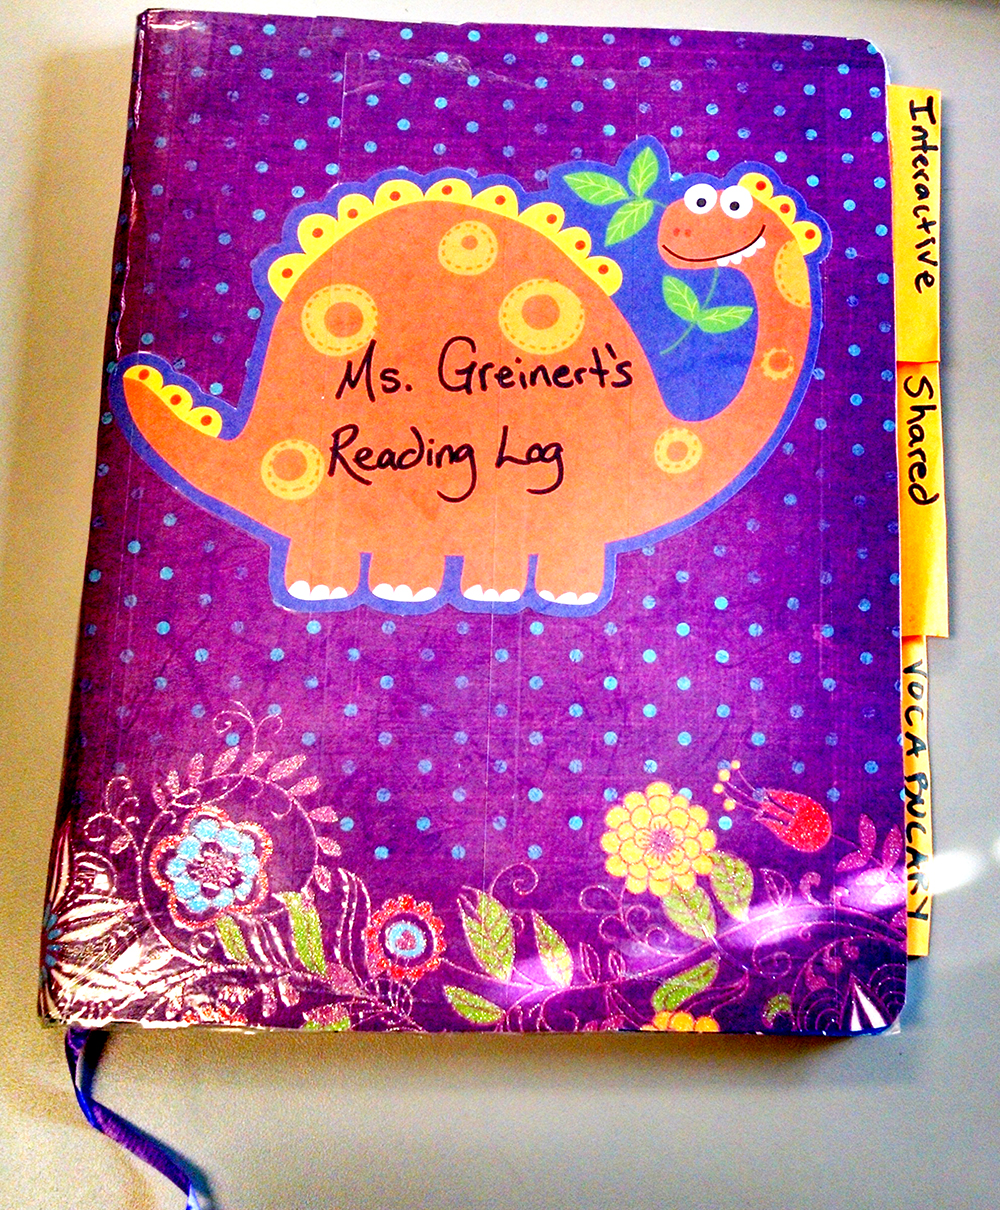
To set up our Interactive Reading Logs, we added three tabs:


  • Interactive Reading
  • Shared Reading
  • Vocabulary

We counted out 36 pages for Interactive Reading, then split the rest of the journal in half. We used composition books (very affordable), and I decorated each student's log after class with dinosaur print I got from the Dollar Tree for a dollar. I also glued in a ribbon to mark the page, making it easy for students to change sections or mark a page with notes they want me to see.


Plickers Website


On the back, we glued down our Plickers cards. Plickers is a great website for quick reviews. By turning the card different directions and scanning the Plickers with your cell phone through their app, the website reads the students answers. It's technology integration without having to have an electronic device per student. All you need is your own cell phone with the app downloaded and an account on Plickers.   


Monday, August 31, 2015

Celebrate Freedom Week

Trying Something New

The past three years that I've taught Social Studies, I've tried to organize our work into folders because there are so many handouts like maps and primary sources involved. However, every year, it has taken more time to insert work into folders in the right order than I thought was worth the time.
So this year, after a lot of Pinterest browsing, I've decided to experiment with making a Social Studies Notebook out of a composition book.


The first week of school we set up our "notebooks" and started Celebrate Freedom Week. I'd like to have covered the front with something more US History themed, but there just wasn't time, and after all, this format is an experiment!
Then we added a table of contents. 


We used sticky notes to mark each unit cover page for easy studying and reference. Each unit cover page has a symbol that is meaningful to the unit at the top and a "Big Question" that we will ask ourselves throughout the unit. 


So on the second day of school, we watched the Brainpop video on the writing of the Declaration of Independence and made very brief, but meaningful notes. 


Then, we made a foldable using an idea I saw on Pinterest. The foldable includes the language of the original Preamble in one color and the meaning in modern English accessible to ESL students at the bottom in another corner. 


On Wednesday, we split into buddy reading groups using "If You Were There When They Wrote the Constitution." Before beginning, I modeled using my classroom plush dinosaurs what good and not good buddy reading looks like. Then, I had the students read only certain parts of the book and report out to the class on them. Our notes looked like below:


And lastly, we added a similar foldable which has the Preamble to the Constitution on it. It looks longer but is actually faster because it has a fewer words.


Thursday, we did a gallery walk. Students had a sheet of copy paper with labels like: Hands/Feet, Voices, Homework, Attitude, etc. labeled on it and we went around the room writing and brainstorming rules. Then we drafted them together onto a huge sheet of brown bulletin board paper and everyone signed it.  (Photo soon to come!)